
Matte Painting Set Extension
Shooting on location is quite a common practice overall when making a music video or a corporate video, as the costs of building a set can often be expensive and time-consuming. On the other hand, dealing with a real set often requires some additional post-production work, like set-extensions or the need for getting rid of unwanted items in the shot.
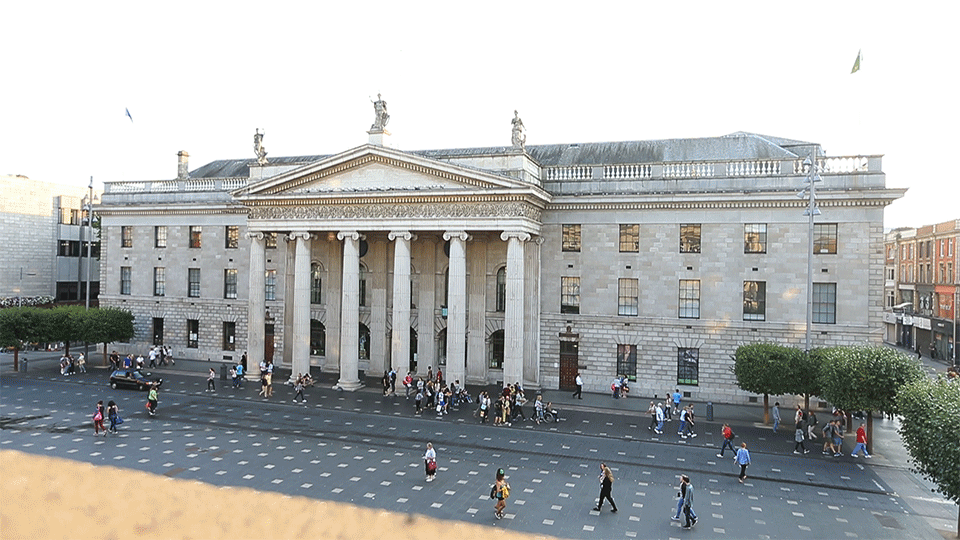
The GLUE team recently worked on a project for RTE’s Storyland; this involved us having to create an explosion in Dublin’s GPO during the 1916 Rising,
After receiving the footage, we had two basic shots to work with:
Shot #1
In the first shot, the main actor hears the explosion and runs to the window to see what the commotion is. The first issue we noticed in the shot/on set was a prominent and modern-day EXIT sign on the upper part of the door in the shot – we knew that this would have to be removed “in post” (post-production); as it happened, it was easier to delete the sign from the shot than to physically remove and replace it on set.

Object Removal
This demonstrates that the need for a VFX supervisor during shooting is fundamental, as they can communicate what will be possible in post and what would be better to do directly on location.
Technically speaking, to “clean” and remove the sign was not a big issue; since the actor was not obscuring the sign, it was easy to create a ‘clean plate’ (in Photoshop) and mask over the affected area, so that we would see a continuous stretch of wall.
The difficulty lay in cleaning white some plastic architrave fittings above the window.
Since the shot was taken from a low angle, the actor is obstructing them at the beginning of the shot. As soon as he moves, they are then revealed behind him.
Scrolling to the end of the shot, we could clearly see the fittings and cables above the window. After exporting that frame from After Effects and importing it into Photoshop, it was easy to create a clean plate using the clone tool. Re-importing the frame into After Effects and covering the original shot allowed us to mask the upper part of the frame with the new plate.
The next problem to fix was at the beginning of the shot: the actor was now behind the mask with the ceiling of the room. The solution was to rotoscope the actor for the amount of frames in which his upper body was covered by the upper mask. Once the actor passes the zone in which there is the mask with the clean plate for the ceiling, rotoscoping was not necessary anymore.
Shot #2
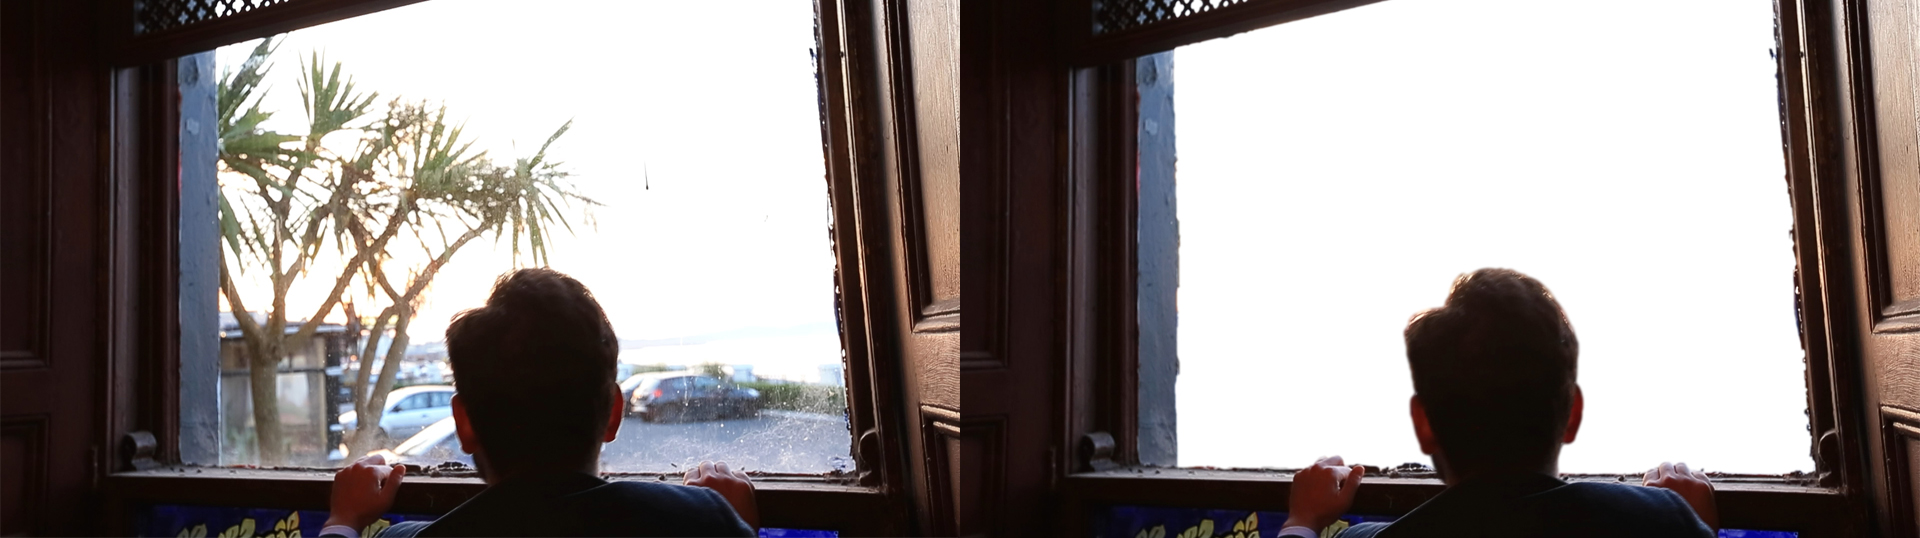
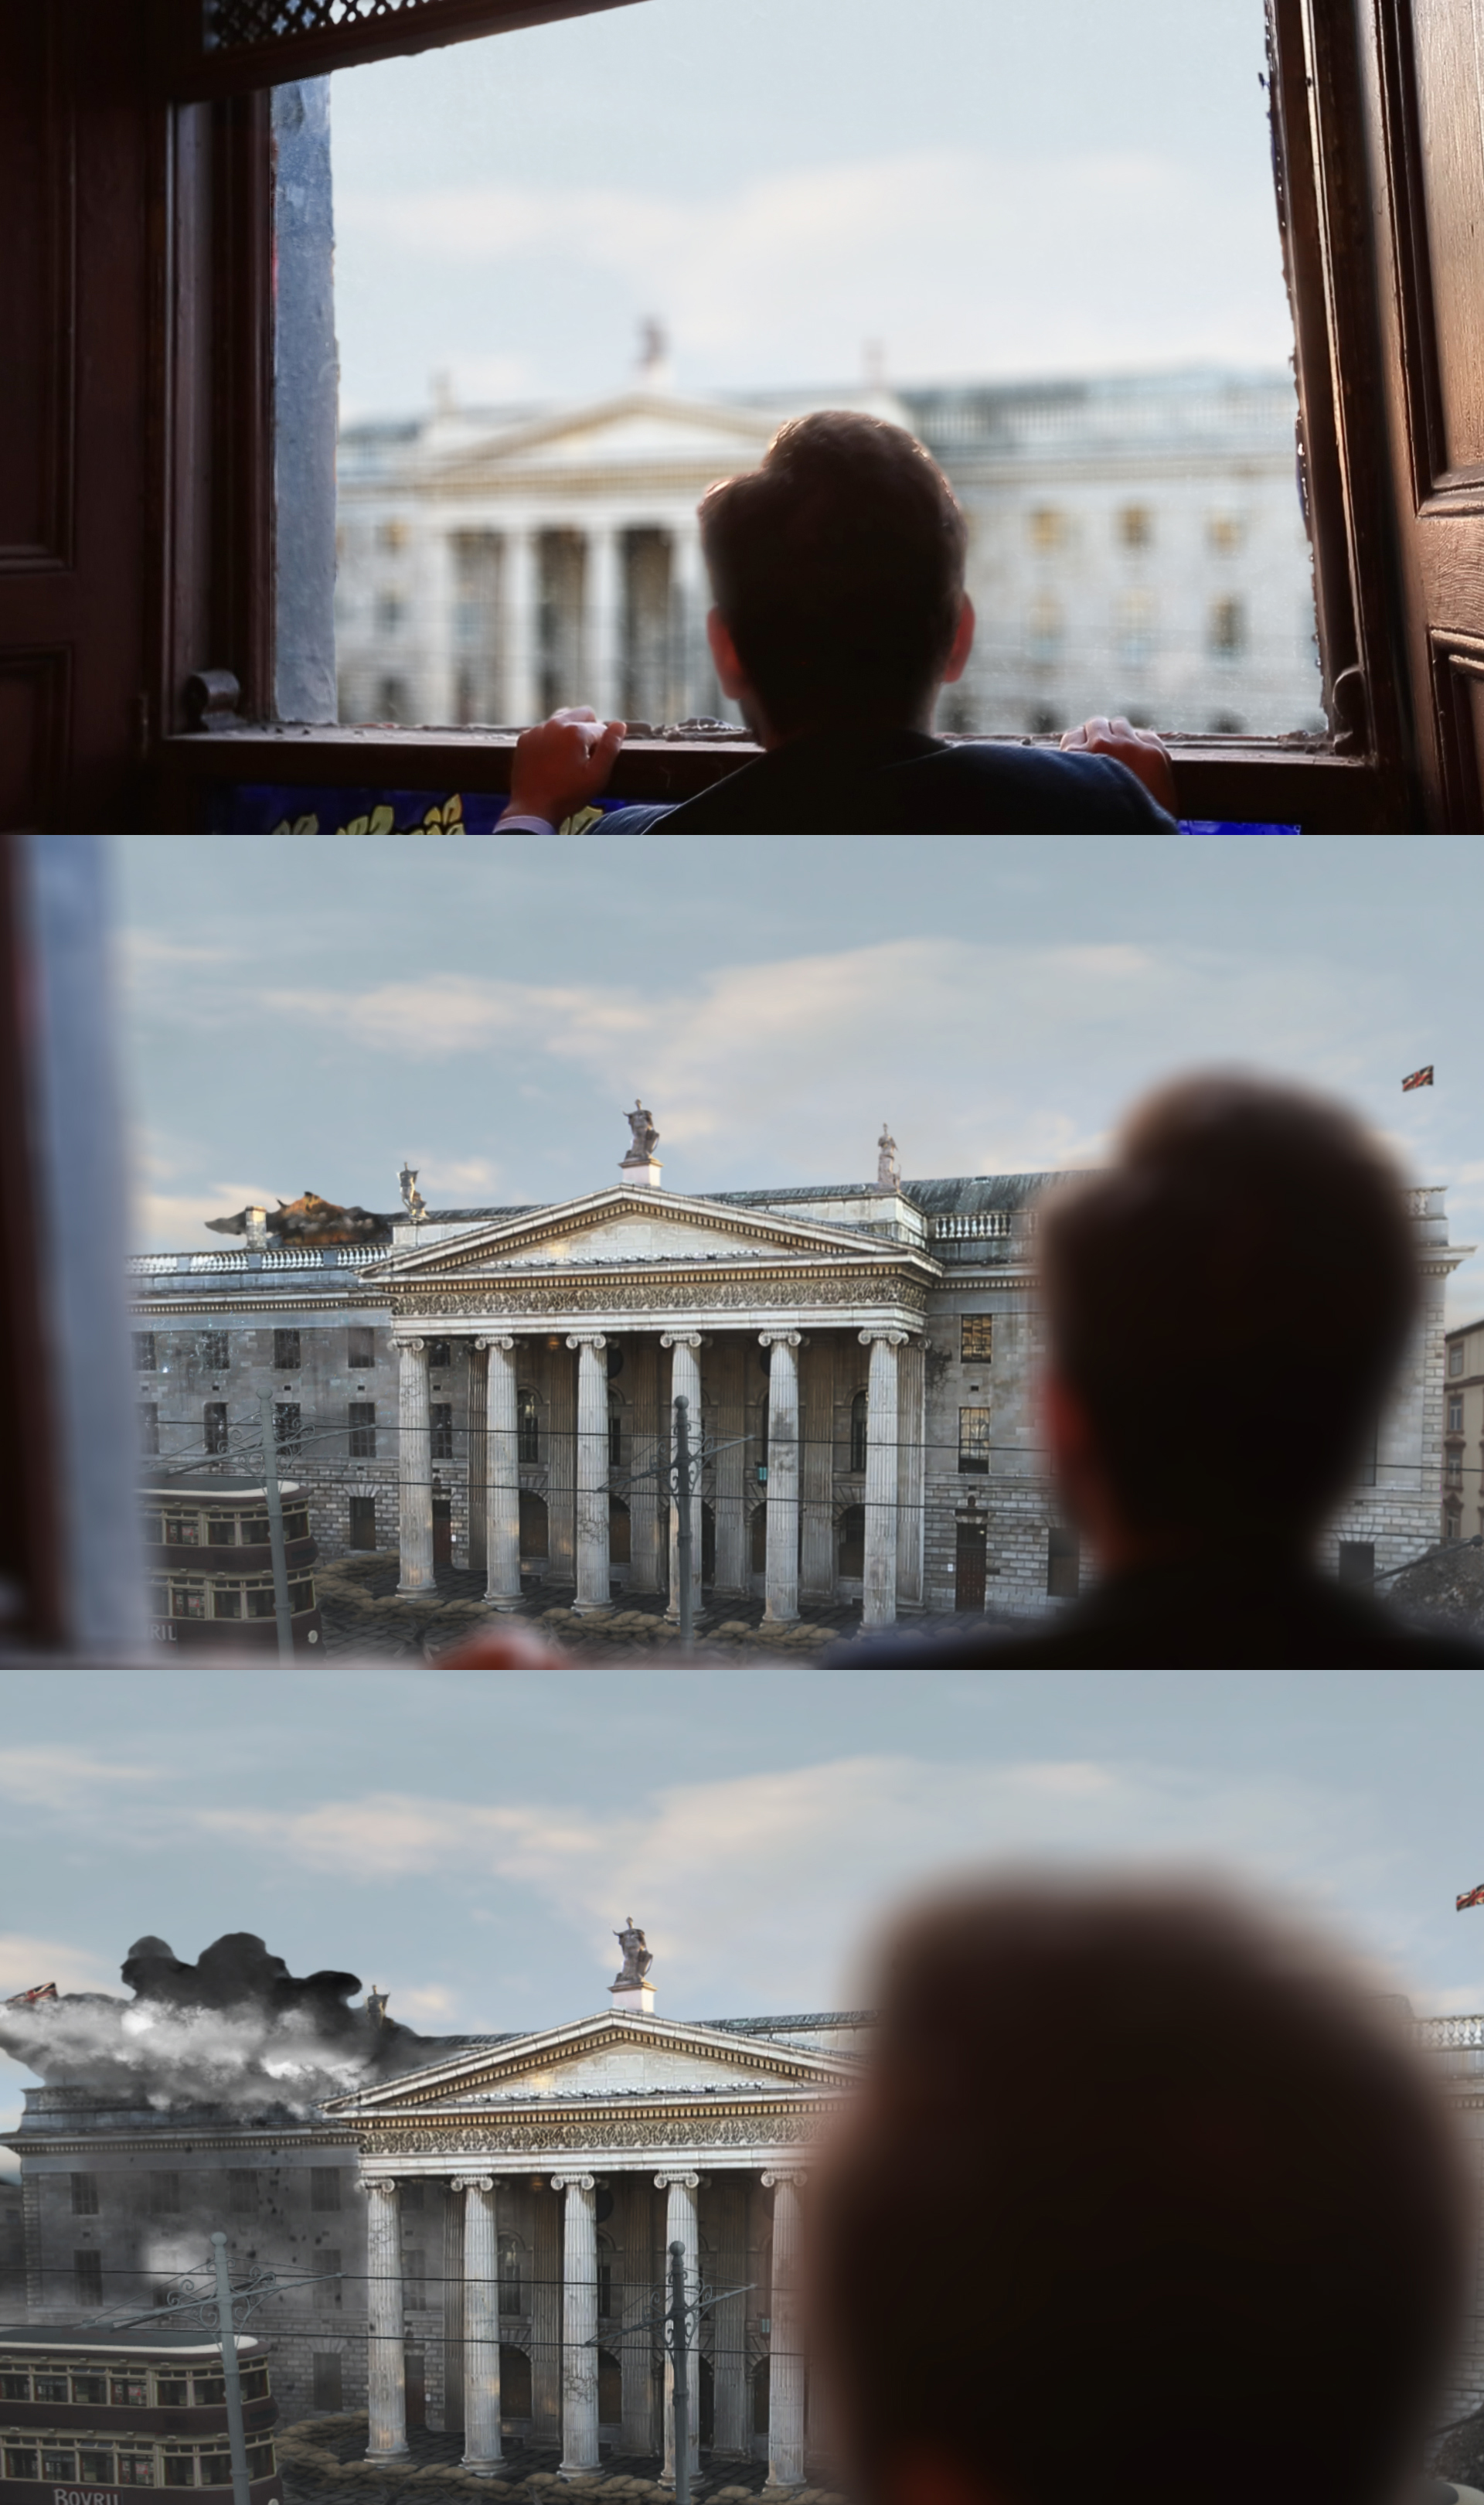
A more difficult shot was the one in which the actor looks out of the window to see a mortar exploding through the roof of the GPO. The foreground shot shows the actor looking through the window, while the back plate shows a 1916 GPO.
Rotoscoping out the Actor
To create this, we shot the actor looking through the same window from the previous shot. That scene was shot on location in Bray. The view from the window on the original shot is of a car park, so rotoscoping the actor was necessary to create a ‘hole’, so that we could see the backplate with the GPO.
Virtual Camera
The scene was shot with a locked-off camera and a tracking effect was added in post, as well as a focus-pull moving from the actor to the GPO, helping to sell the shot convincingly. Creating a tracking-shot in post involves scaling-up the subject digitally at the expense of quality, but creating a virtual focus-pull helped to avoid loss of quality and pixelation of the original plate. Another thing that was created to make the shot believable was a dirt-transparent solid to recreate the glass that was removed from the window during rotoscoping.
While I was busy with that, my colleague was working on a matte painting containing different elements of the backplate/scene: the GPO (both before and after the explosion), the trams on O’Connell street, and various scene elements built in 3D space to match the shot. Once the matte painting was ready, I added it to the window and into a 3D space in order to have a parallax-effect as the virtual camera moves towards the window.
While that was being prepared, I used a reference picture of the GPO to create the explosion.
Reference videos on youtube of real explosions were very helpful to get an idea on how a mortar explodes.
After creating the explosion flash and the smoke layers, they were added to the roof. Particles of glass and dust were added as well for each blown-out window, although the timing of each explosion was offset by a few frames so that the windows would not all explode simultaneously.
The pillars on the front part of the GPO were masked and duplicated, so that the smoke could also go behind them, giving the impression of a 3d space.
The sky was also replaced with a still image. To give the sky life and movement, the position of the image has been keyframed, so that it slightly moves right to left. The movement is very subtle, but really helps to sell the shot.
Given that we had only two days to build and complete the scene, we would have loved more time to make it more believable, but overall we were really happy with the results, again delivering quality and professionalism to the tightest of deadlines.