When it comes to shooting film for a video, cost is without doubt a major concern.
When choosing between whether or not to use a green-screen, building an actual set, or finding a real location for your shoot, money should ideally not be the deciding factor, but there are overall a number of issues that may have a far more relevant impact on that decision.
Of course the matter of cost usually has a big impact on the final choice, but whenever possible and wherever your story allows, the best solution is to shoot on location in order to avoid a lot of extra work during postproduction.
I am always mindful of my college lecturer’s advice: “get as much as possible on camera”. The more you can get, the less you will have to fix or create in postproduction.
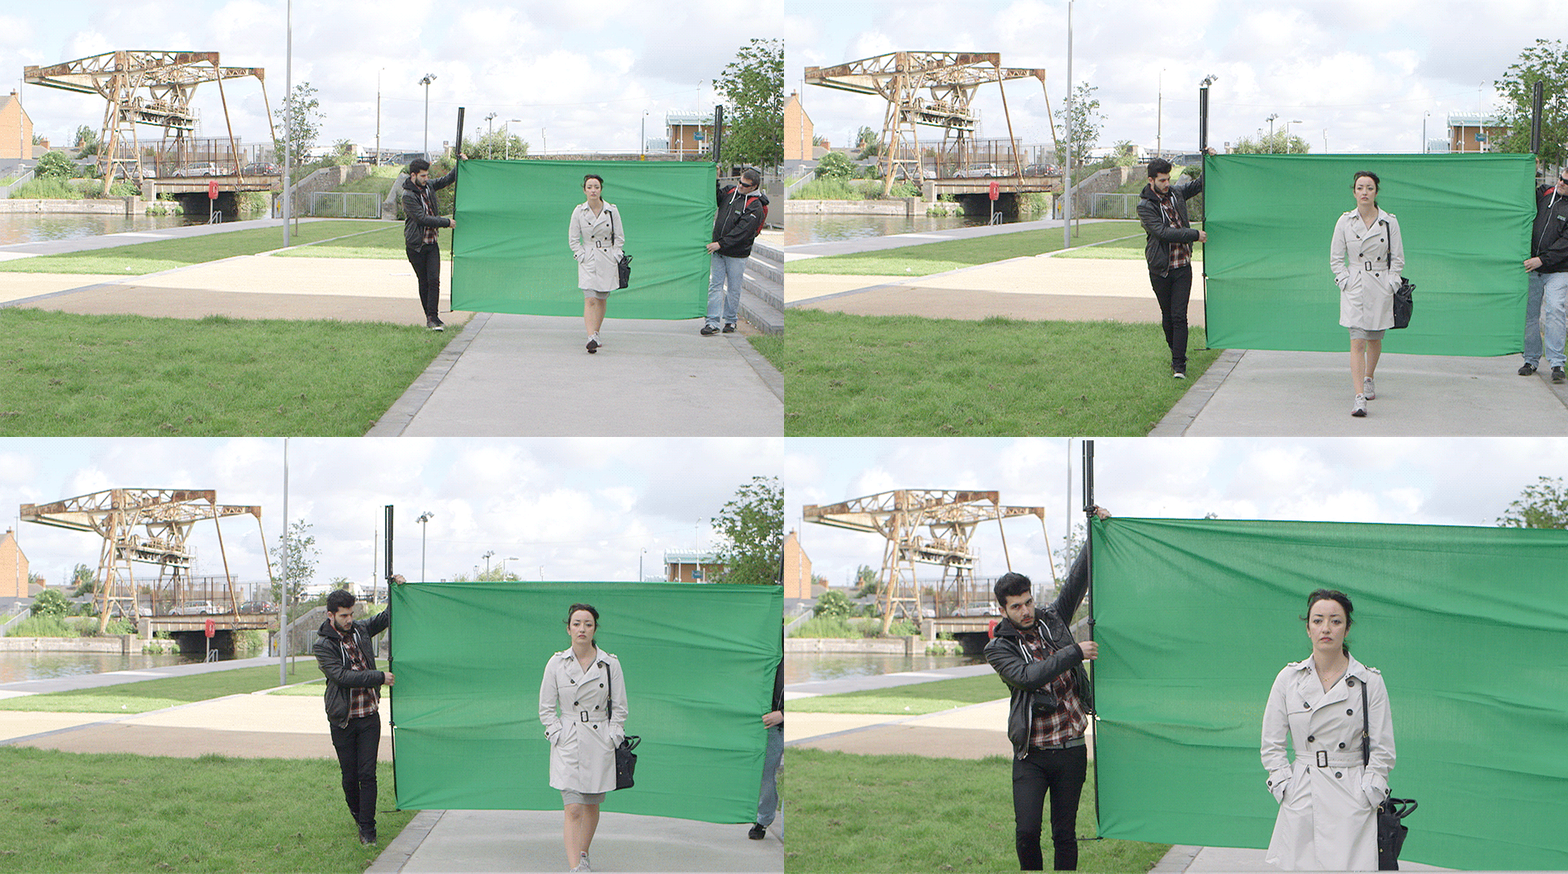
That said, it is also true that it may not always be possible to get a real location that perfectly matches the setting or vision that the director has in mind. In fact, most of the time a mixture of real location and green-screen set ups placed throughout the set are used in film.
Usage of green-screen on location
By doing this, the VFX artists are facilitated in the creation of set extensions, or in changing portions of the real set, integrating them with other elements that are not present during the shooting, but that are essential to the story.
The VFX team can be very useful on set, especially when shooting on a green-screen, but their hard work really starts in front of a computer. The first step that a VFX artist usually has to deal with when it comes to green-screen shots, is the process of keying.
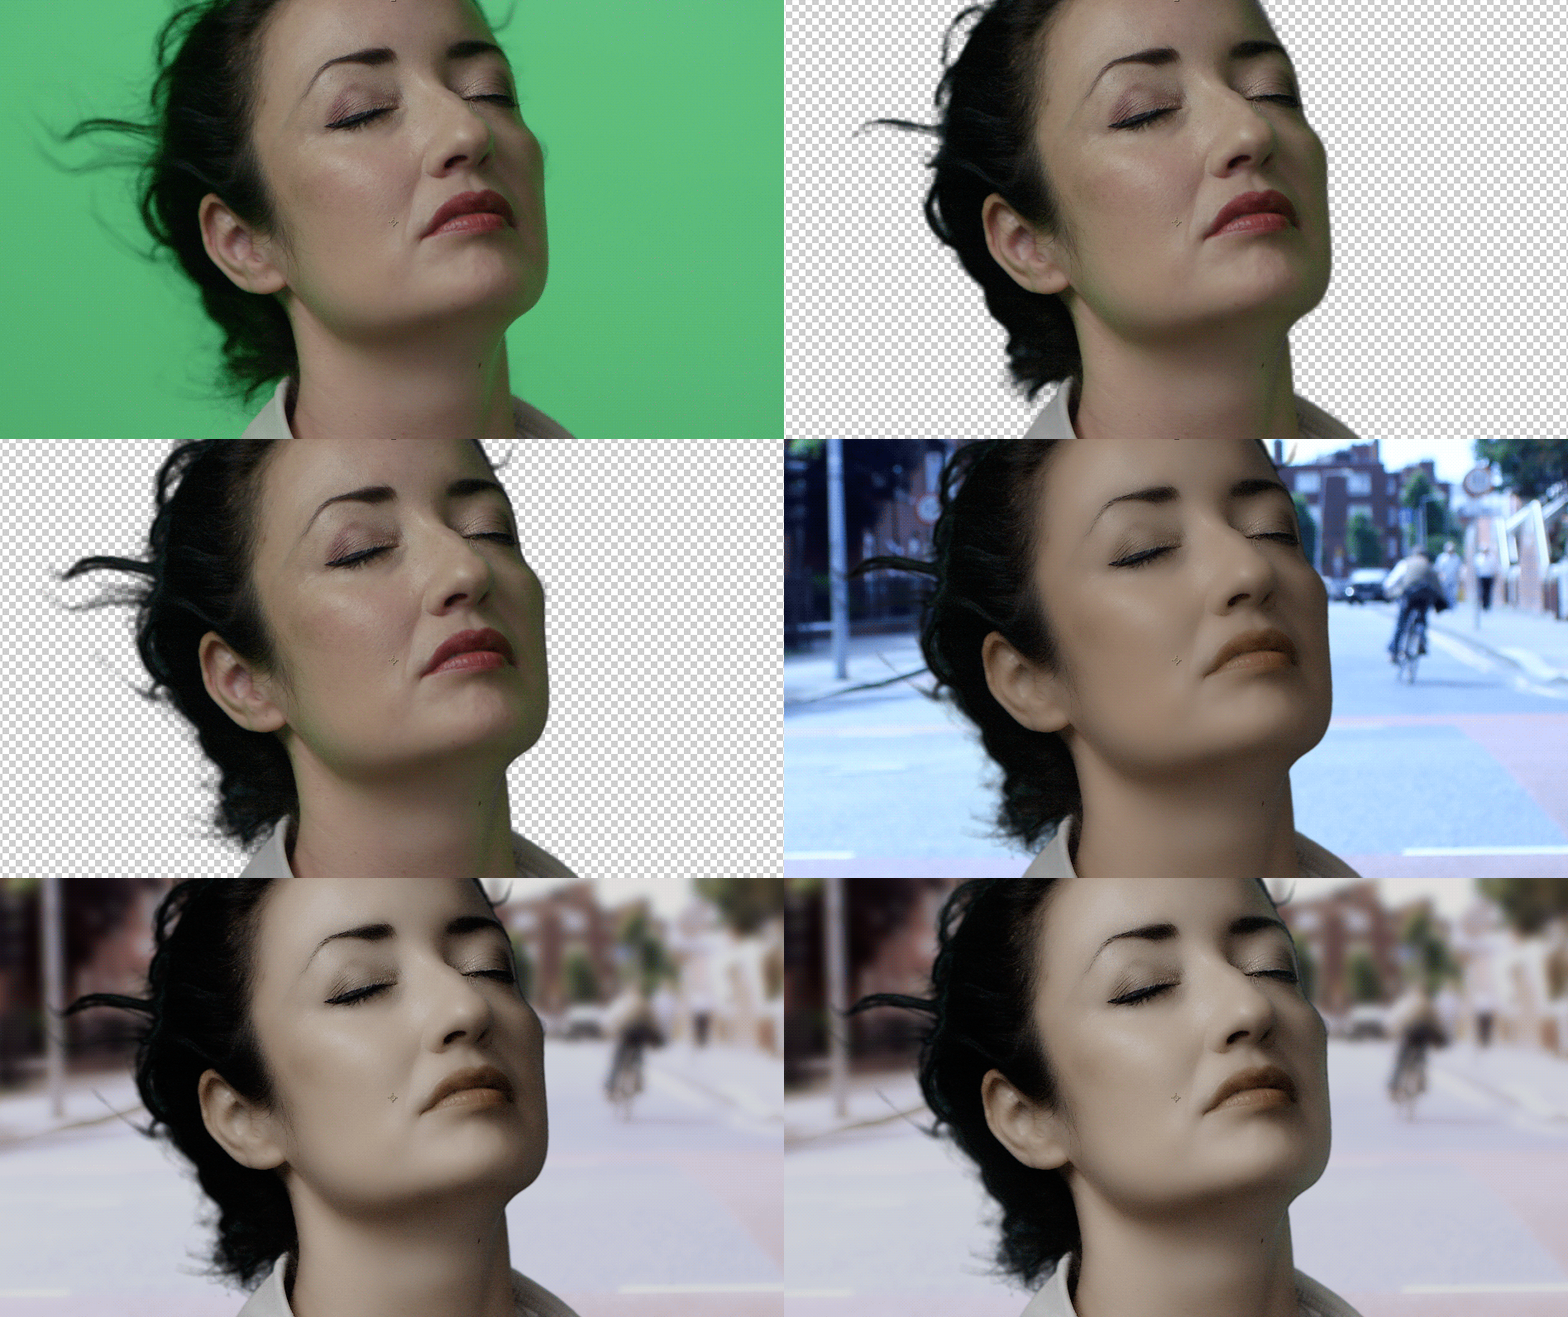
Keying (or masking) is the act of taking the green (or blue) background away from the footage in order to have the actor (and/or props in the scene) isolated on a transparent area. This allows the visual effects artist to add elements to the background (or foreground) in 3D
space and create the illusion of a real environment.
In programs like After Effects, there are tools that are there to help “make the magic happen”. Ideally, a perfectly and evenly lit green-screen would allow a perfect matte extraction with just a few clicks on the computer, but results are never achieved in a few simple clicks.
Even when green-screen scenes are shot in a studio (where the possibility of controlling the lights is at its highest), the footage will almost certainly present shadows, grain, or some spillage on props or the actors themselves. This spillage comes from the light bouncing from the green or blue layer behind them and more often than not has to be fixed in the post production process, although the process of backlighting can help reduce this unwanted effect.
In fact, keying a green-screen shot can often be quite a long process, depending on the complexity of the shot itself but also depending on the quality of the lighting in the shot. Difficult shots require a long process of masking, sometimes even rotoscoping frame by frame and applying different keying on different portions of the shot (or of the actor) to create a clean matte that will allow you to isolate the foreground from the background.
An important thing to keep in mind is to try to keep as much detail as possible, so that the keyed shot will look believable when integrated into the final scene.
A loss of small details (take hair or fringed edges for example) will make the actor appear off. Indeed, the entire scene may be affected, producing odd or artificial results.
Another thing to pay attention to is to create soft edges around the matte. A correct light wrap around the keyed items, combined with proper colour correction (that matches the background color tone) will help in making the foreground elements blend nicely with the artificial background.
From green-screen to final result
The advantages of shooting on green-screen can really help your production, allowing you to freely imagine any kind of set or world to put your actors in, or to create events such as explosions in the background without any risk for the actors.
Another plus to shooting inside a green-screen studio, is that you don’t have to worry about the weather! But keep in mind that all the nice things have a “bad” side…
Shooting on a green-screen can save you the cost of building a set or renting a location, although it will make your post production work longer and possibly more expensive (but probably not as expensive as it would be to build a full set).
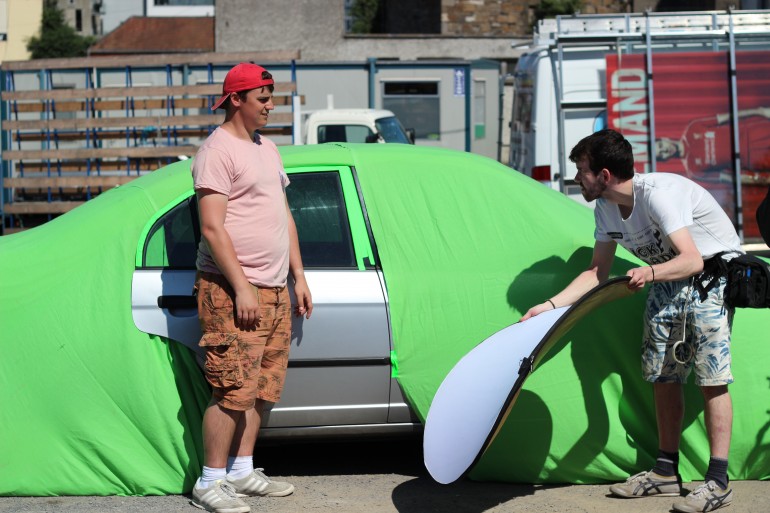
Green-screen car replacement
During pre-production and pre-visualization of your project (no matter if for a music video, a short, a feature film or a corporate video) you have to carefully evaluate the pros and cons of shooting on green-screen before deciding and choose not only the cheapest way of completing the project, but also the best way to tell your story.
We at GLUE are well-versed at helping you to make these decisions with ease, please feel free to contact us with any quotes or queries you may have and do continue to follow our blog posts as we reveal more about these processes over the coming weeks and months!…


